Building the MP-1 Rack collection: a modular racking system
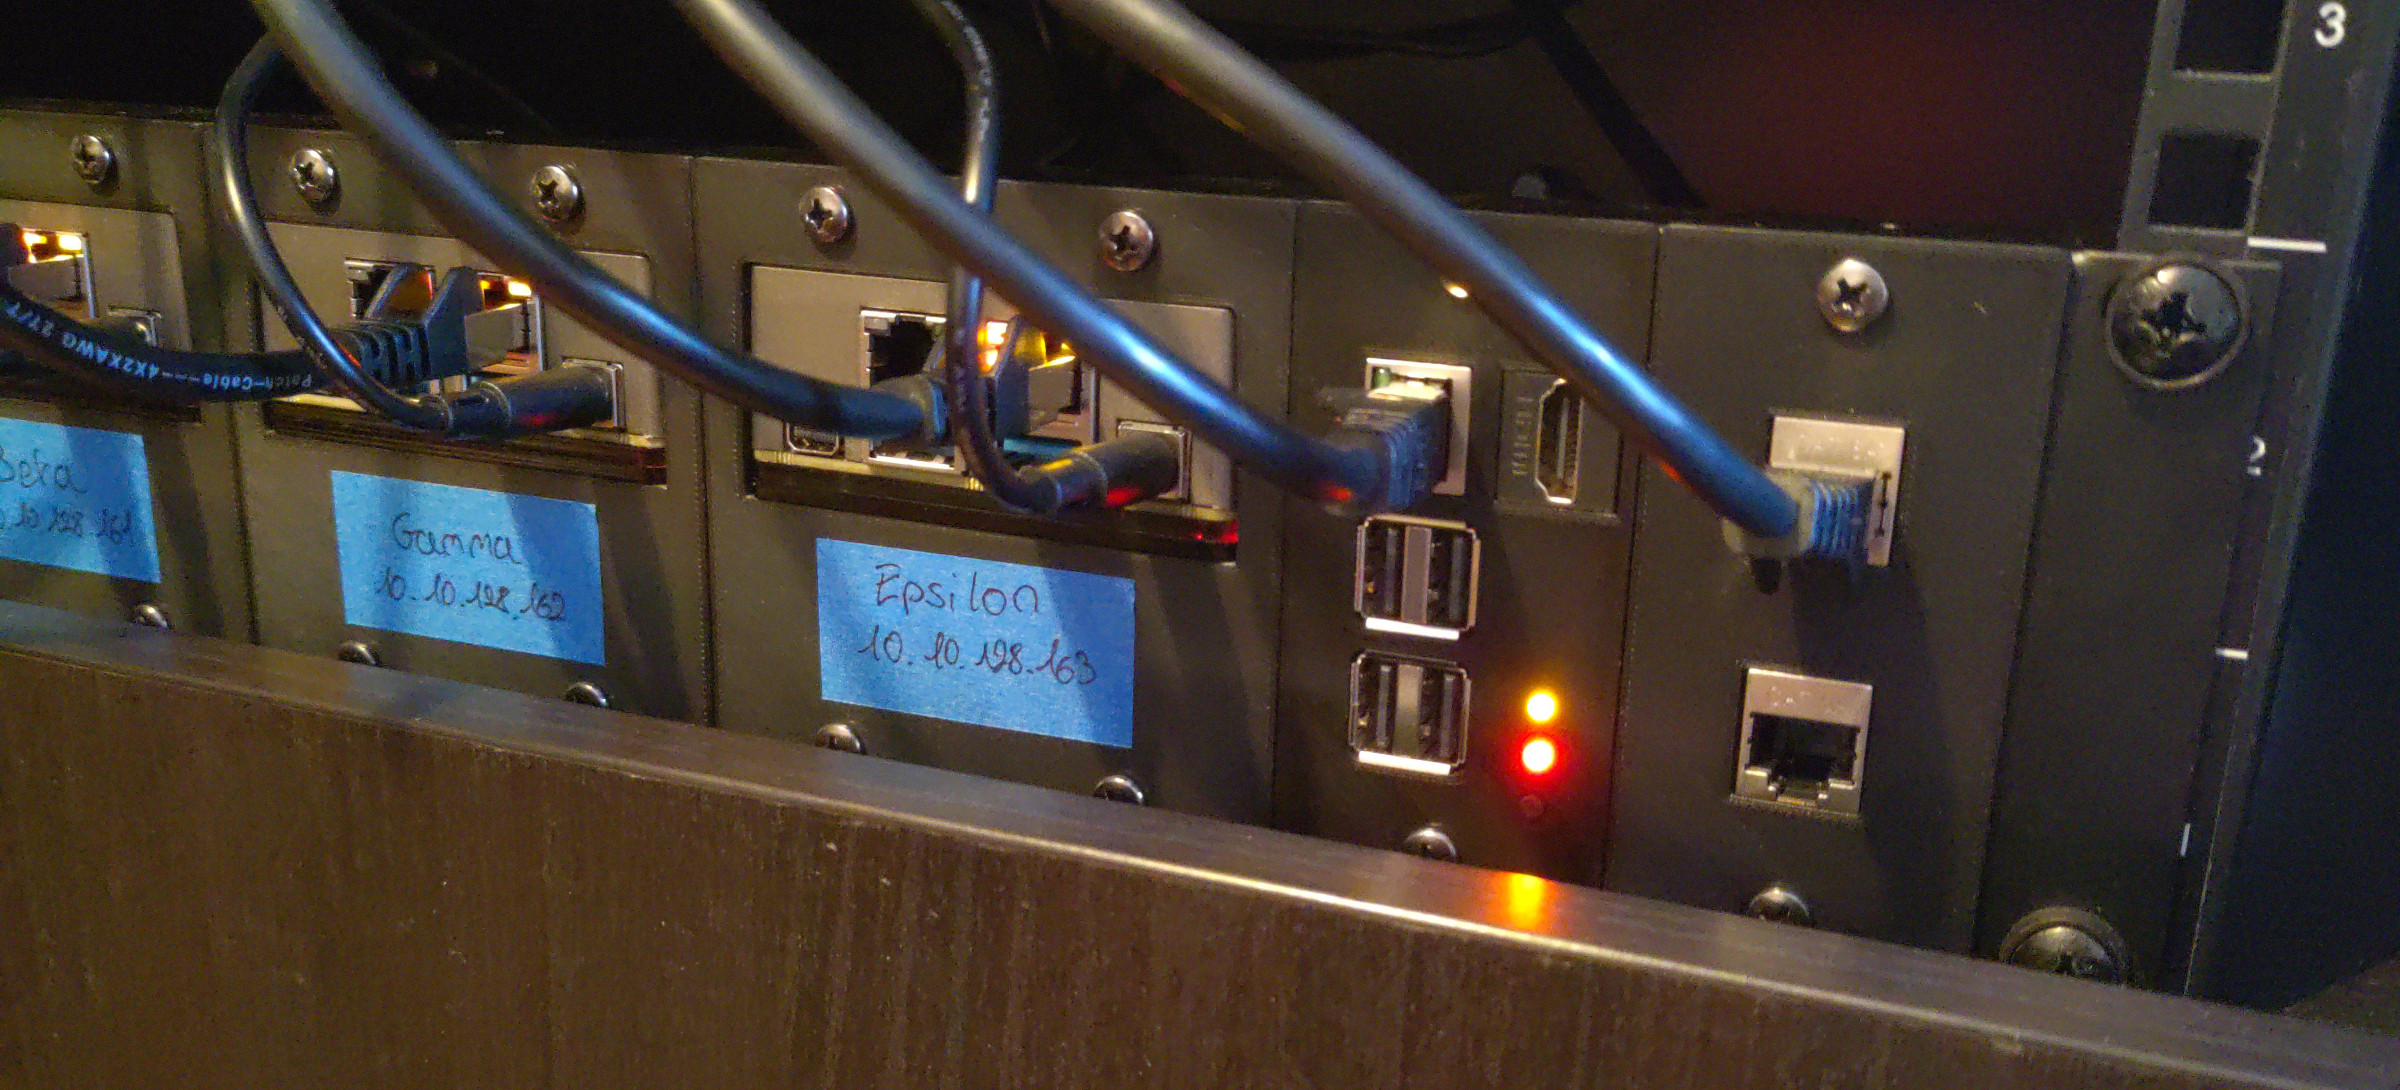
After receiving my long awaited ZimaBoards, I was looking for a solution to install them in my 19" rack easily before starting building my Kubernetes cluster.
I’ve seen in the past some modular racking setup for the Raspberry Pi such as the Pi Blade McPiFace from Stephen Harrison, the RackPi 3D model by Daniel Reinke or the Raspberry Pi Rack covers made by Daniel Mostosi that I really liked. The common denominator between all of them being the use of the DAP Audio MP-1 modular rack frame as a base.
I decided to take inspiration from those existing modules and build my own modules for the MP-1 frame to achieve the perfect modular rack I wanted that could house my 4 ZimaBoards, a Raspberry Pi and some keystone jacks. This started by ordering the frame and some official blanks for reference.
The DAP Audio MP-1 Modular Frame
While waiting for my order to arrive, I started looking around for some dimensions to start designing each mount. There isn’t much data available on the internet and the main resources for dimensions was the previously mentioned 3D models.
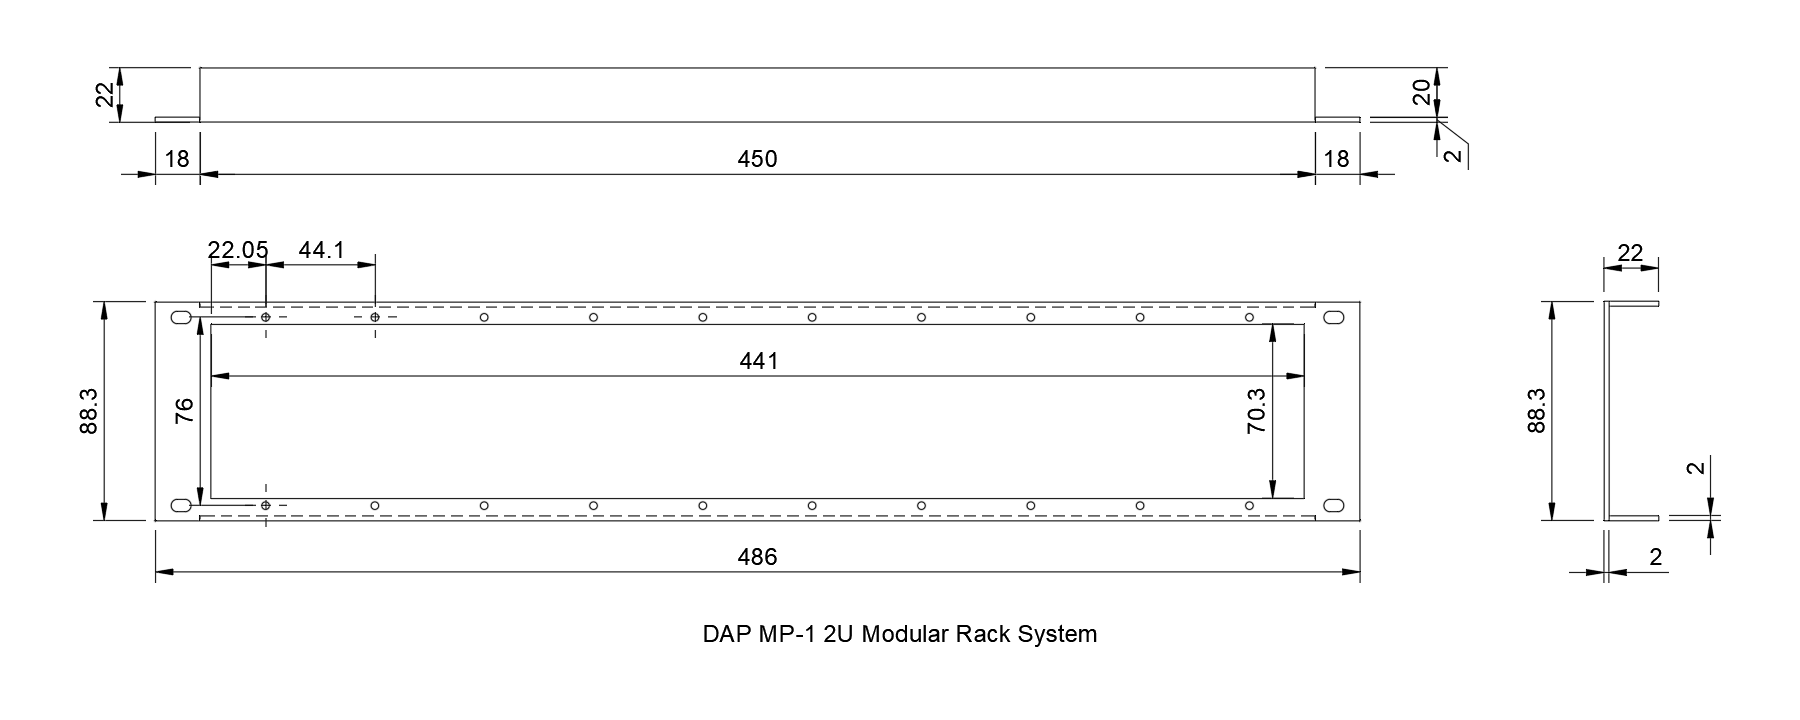
Once I received my order, I took the time to measure everything before installing the frame to help others build their custom modules in the future.
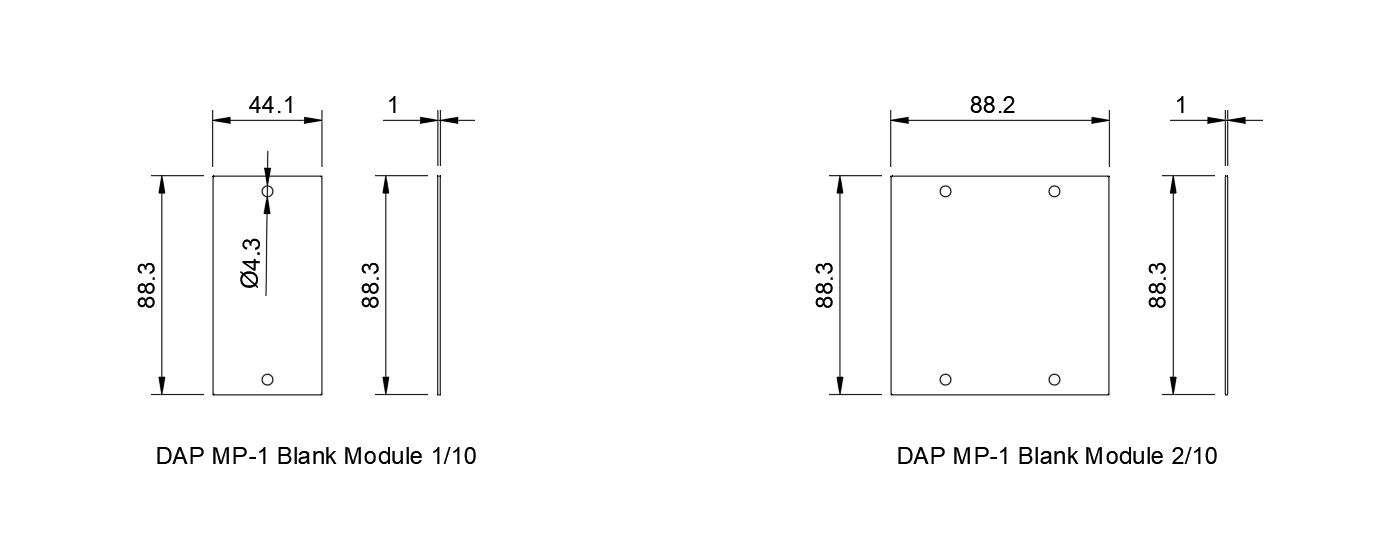
The frame is a 2U 19" rack panel made from 2 mm bent sheet metal consisting of two 9 mm wide rails and a 441 mm × 70.3 mm center opening. Each rail has ten 3 mm untapped screw holes, though the panel is delivered with the required self-taping screws required to attach your modules. Those dimensions provide space for ten 44.1 mm × 88.3 mm segments, which was confirmed by their blank module measurements.
Here is a drawing of the dimensions I was able to measure from the frame itself and from the official one and two segments blank face plates available on the Music Store website.
The MP-1 Rack collection
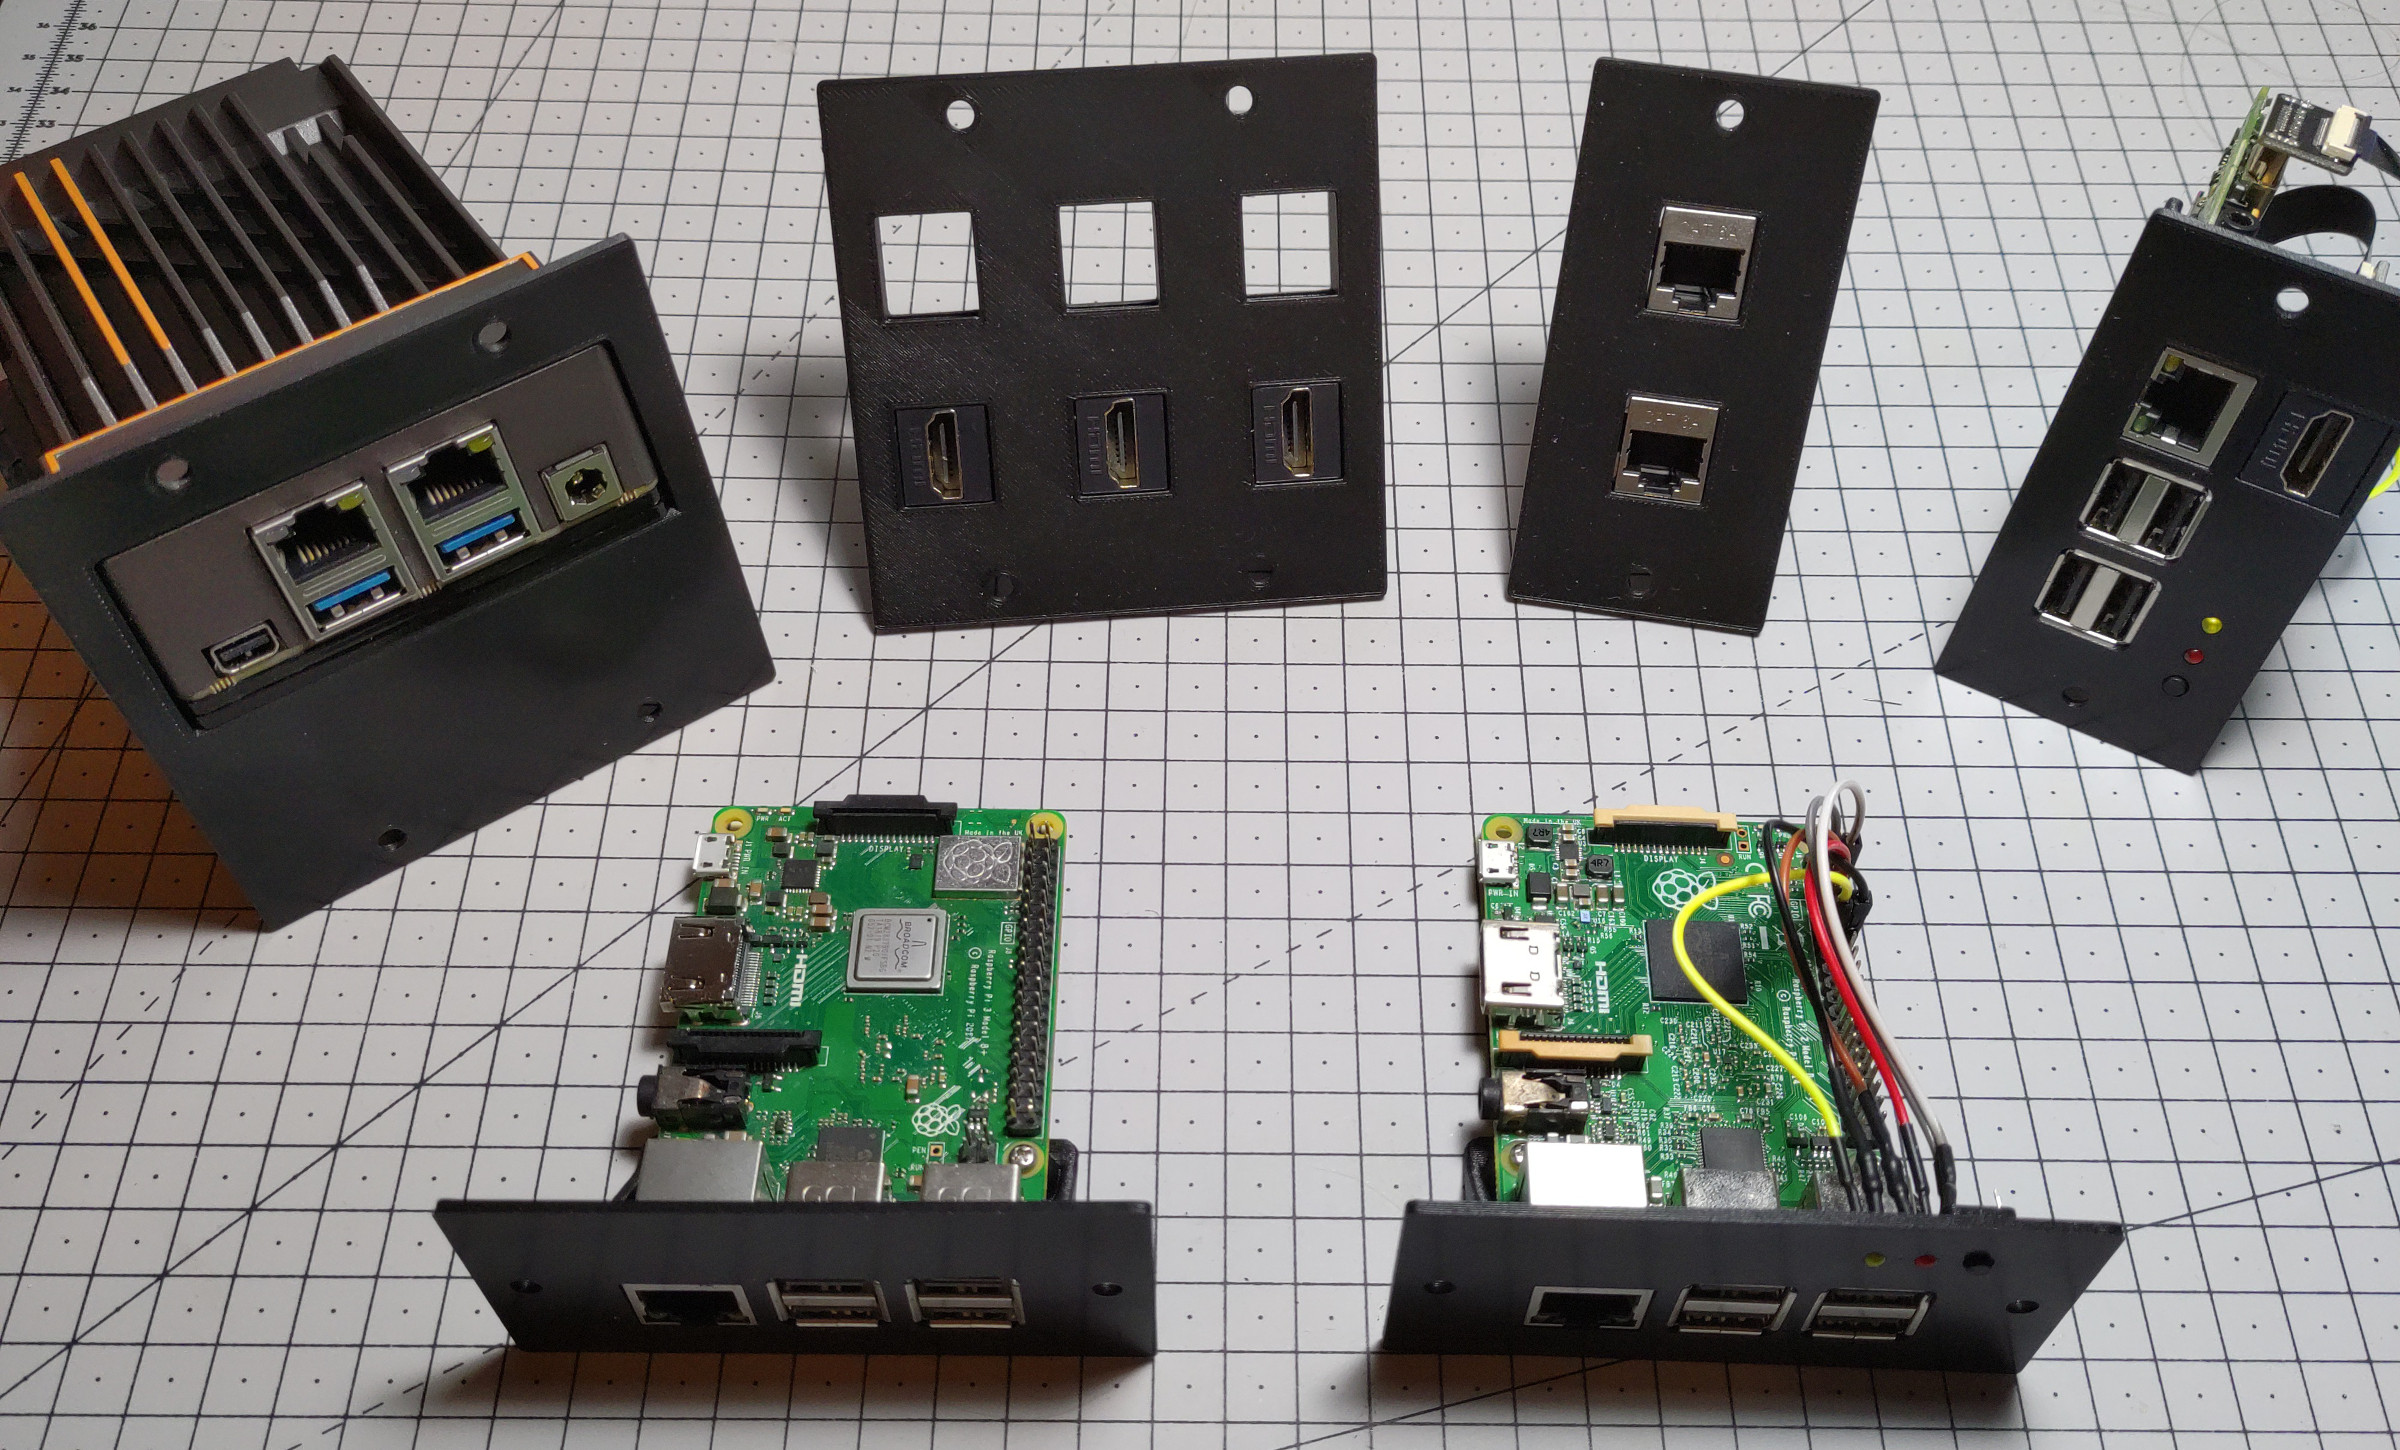
Now that I had my base, it was time to build the modules to fill in the frame with my small computers. I ended up building a collection of four modules to fit everything I needed:
- a ZimaBoard mount that can accommodate up to two 2.5" hard drives
- a Raspberry Pi mount with a power button and front facing HDMI port
- a keystone module in two size to house either 2 or 6 jacks
- a blank module to fill in empty spaces
ZimaBoard module
I started by first building the ZimaBoard mount, the requirement here was to create a simple but effective way to mount it with spaces for two 2.5" 9.5 mm drives. I first looked at integrating an existing hot-swap solution such as the Icy Dock flexiDOCK MB522SP-B in my model, sadly, those 3.5" modules are too large to fit in the 2 segments space I wanted this module to take (so I can fit 4 of them on one frame).
In the end, adding some simple rails under the mount was the solution I went with, it does not provide any hot-swap capabilities but works extremely well with the official SATA Y Cable.
Raspberry Pi module
I then went on to create my own Raspberry Pi module, as said in the introduction existing solutions already exists, but none had both space of a front-facing HDMI port and some LEDs / buttons. This started with just a simple mount and cutouts, I decided to use heat-set insert as a mounting solution here to strengthen the connection between the Pi and the module.
Following that, I added both a space for a 6 mm × 6 mm momentary switch and two 3 mm LEDs that I have configured as a gpio-shutdown trigger, a simple power LED, and an HDD activity led (more details is available on this model Printables page).
Finally, I added a keystone jack mount, so I can use one of those slim FPV HDMI cables and an HDMI keystone to add a front facing HDMI port (as those cables are also available as mini-HDMI to HDMI, this solution can also be adapted for the Raspberry Pi 4).
I decided to publish multiple variants of this specific model module as I understand that not everybody wants some shiny LEDs or spent the necessary cash to add the front-facing HDMI port. I’ve also added a screw-in version of each variant if you do not want to use any heat-set insert to mount your Pi.
Extra modules
Now that I have a keystone jack footprint, I decided to add two modules to the collection that just allows you to attach some keystone to your frame: a small one segment module that can house 2 jacks and a two segments module for 6 jacks. This ended up being quite a handy way to cleanly connect my router to my rack without having an exposed long cable.
I also added one segment and two segments blank modules to the collection to provide an easy way to plug your empty slots if you haven’t bought the official ones with your frame or to use as a base when creating your own modules.
Download the collection
You can find all those models with their Fusion 360 source files in the MP-1 Rack collection on Printables as well as a standalone version of the ZimaBoard mount to use a simple desk stand.
I really hope this collection will help others create their perfect mounting solutions for their small single board computer and inspire more people in building modules for the MP-1 frame!


